This is a sub-page of the multi-page documentation for the OneCellPipe pipeline of OneCellBio.
Command-line parametersss
You can run the entire raw data processing with the following command after navigating to the onecellpipe folder:
nextflow onecellpipe.nf --dir {path/to/your/fastq-files}
Here are all the options you can use if you do need to modify these defaults (use double dashes “–” for these):
| Required arguments: | |
|---|---|
| –dir {path} | Path to the directory with the fastq files you want to process. The result data will be written here as well unless you specify –out. Avoid spaces and special characters. |
| Optional arguments: | |
|---|---|
| –worker {number N} | Use N different parallel processing jobs, default: 1. This will affect the processes filter and sort. It is recommended to keep this number to 1 to process a single library if you see strange failures. |
| –worker2 {number N} | Use N different parallel processing jobs for the quantification step, default: 10. |
| –config {file.yaml} | Use a complete configuration file as expected by the indrops library. Use this option if your set up differs from the default the system is expecting, default: NULL (auto-generate the config file with standard settings) Please see these instructions for further help. |
| –out {dir} | Write the output to a specific directory. Default: – (Use the same dir the fastq files are in.) |
| –min_reads {number N} | Indrops quantify parameter: Ignore barcodes with less than the specified number of reads, default: 100 |
| –min_counts {number N} | Indrops quantify parameter: Ignore output for barcodes with less than the specified number of UMIFM counts (This would speed up downstream processing.), default: 0 |
| –samplesheet {path to SampleSheet.csv} | If you provide the sample sheet for the given run, QC results can list sample names instead of barcode sequences. The required format of the file can be seen in sampledata/SampleSheet.csv, default: – (no sample sheet) |
| –email {your@email.com} | Send a notification email (hosting and receiving mail server must support it) when the pipeline has ended, default: NULL (do not send an email) |
| –qc {0,1} | Deactivate the QC steps for fastq files, default: 0 (don’t run QC) |
| –species {human, mouse} | Use the reference genome of either ‘human’ (default) or ‘mouse’ |
| –name {name} | Provide a specific name for the project. This is only used within indrops. Avoid spaces and special characters. Default: – (use library name read from fastq files) |
| –help | Only print usage instructions |
| –docker {0,1} | Use Docker instead of Singularity. Make sure to update the nextflow.config file as well. (Default 0, use Singularity) |
| –sudo {0,1} | When using Docker you have to run with elevated privileges on some systems (sudo). Default: 0. |
| –transpose {0,1} | Create a second count matrix with barcodes vs. genes at the end. (Default = 0) |
| –timezone {name} | Set a specific timezone for the timestamp at the top of the log file. Default “EST”. |
| –bam {0,1} | Create bam files with the processed data, default: 0 |
Additional Nextflow parameters
Please use single dash “-” for these!
| -with-report [file name] | Report the execution status, the launch command, overall execution time and some other workflow metadata. (Details) |
| -with-timeline [file name] | Nextflow can render an HTML timeline for all processes executed (Details) |
| -with-trace | Create trace.txt in the current directory with information about each process (Details) |
Using screen for remote sessions
The control script will continue to run for a significant time as the different processing steps are executed. You would not want to interrupt the script to avoid loss of data or time. On a remote computer (login node or Amazon cloud machine) it is therefore a good idea to run the command within a “screen session” in case your connection gets interrupted, sending the output to a file and detaching from the screen once you see the pipeline is running:
screen

nextflow onecellpipe.nf --dir {path/to/your/fastq-files} >& 1cellpipe.out &

[ Press <ctrl><a><d> to detach ]
You can re-attach to the session with
screen -r
You can list all running screen sessions with
screen -ls
There is a screen on:
	48717	(Detached)
1 Socket in /var/folders/tc/j1_xv_rx3k1535wnv0000qb40000gn/T/.screen.
more details about the screen program are e.g. here.
Using the Docker container software system
As an alternative to Singularity you can use the Docker container system.
If you are using the AWS AMI we are providing you simply have to activate the service first:
sudo systemctl start docker
Otherwise the installation of the free community edition is described here: https://docs.docker.com/engine/installation/.
For example on an Ubuntu amd64 system this would mean the following sequence of commands:
sudo apt-get update
sudo apt-get install -y apt-transport-https ca-certificates curl software-properties-common
curl -fsSL https://download.docker.com/linux/ubuntu/gpg | sudo apt-key add -
sudo add-apt-repository "deb [arch=amd64] https://download.docker.com/linux/ubuntu xenial stable"
sudo apt-get update
sudo apt-get install -y docker-ce
sudo systemctl enable docker
sudo systemctl start docker
Start the Docker software if it is not already running. To test type
docker ps
on the command line. The result should be a list starting with “Container ID”. (Note: This reporting is not working well on all systems)
To switch Onecellpipe from Singularity to Docker you then only add the parameter –docker 1 on the command line. (This will re-write the nextflow.config file with the correct settings). The pipeline would then be run like this:
nextflow onecellpipe.nf --dir data-dir --docker 1
If you see permission issues, you will need to run Docker commands as sudo (user with administrator privileges). In this case:
- Run sudo docker ps to test again
- Add the parameter –sudo 1 on the onecellpipe command line.
To switch back to Singularity simply use –docker 0 (this is a “zero”) or skip the parameter. Stop the Docker service with:
sudo systemctl stop docker
Using a config file
If your file set up different from the default expected by the pipeline, you can still use the onecellpipe by using the –config parameter providing it with your prepared configuration file. The file has to be in the expected format, e.g like here.
If there are problems with mixed files and libraries, move the fastq files into separate directories and run the pipeline on each library individually.
Power users: Using the container for additional analysis
The onecellpipe software image has all the software installed to run the indrops pipeline and the other analysis parts described here within an Ubuntu Linux system. If you are familiar with this environment, you can also manually create a container from the image, log in and run these or other analysis steps on the command line. Using Singularity with the image file already available this would be:
singularity shell --workdir /tmp onecellpipe/bin/onecellpipe-25-2.img
Using Docker, the same can be achieved with:
DATA=/path/to/your/data
docker import onecellpipe-25.2.tar.gz onecellpipe
docker run -it --rm -m 4g -e USER --mount type=bind,source=$DATA,target=/tmp --name oncellpipe-container oncellpipe /bin/bash
Make sure you set DATA to your fastq directory. Adjust the version of onecellpipe-25.2.tar.gz if necessary.
Parallelization
To enable or increase parallel processing and therefore increase the analysis speed (and when using a HPC), increase the number of “worker” jobs on the command line, e.g. 100 for the quantification step and 5 for other steps with the OneCellPipe parameters:
--worker 5 --worker2 100
Please be aware that the indrops software sometimes seems to fail at the next step of the pipeline if the number of workers is too high.
In order to check for jobs running in parallel you can watch for Nextflow processes being submitted directly after one another:

If you execute the pipeline on a multi-core/CPU machine, you can check for multiple processes, e.g. alignment steps, being executed:
top

When running with Docker containers you will also see multiple containers being created (for Singularity this is not as visible):
sudo docker ps

Uploading & downloading data to S3
To process data on Amazon cloud machines, it is convenient to use the cloud storage S3. In order to get your data there and back again your can use the browser interface of S3. If you don’t like this or you need to transfer many files it might be more convenient to use use other tools:
- The AWSCLI tools allow command-line access to S3 and other cloud services. For example to copy a directory “myfolder” into the bucket “mybucket” you would do:
aws s3 cp myfolder s3://mybucket/myfolder --recursive
Details are here.
-
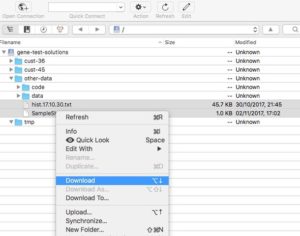
Cyberduck interface Cyberduck is a free GUI program to interact with S3 and similar storage systems.
It’s available for Mac and Windows.